I hope everyone is having a lovely Saturday!
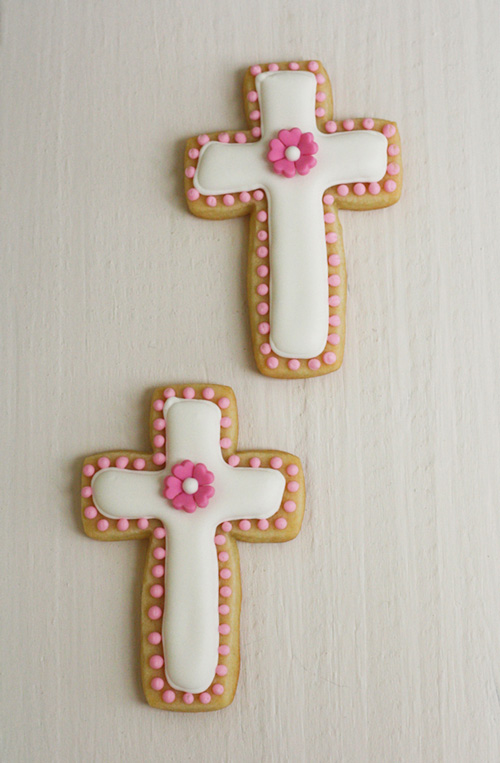
Even though I loved making the Monogram Cookies and my new favorite Rose Cookies for my cousin’s Baptism, I really wanted to add a final touch that would celebrate the occasion. Truth be told, the cross cookie was the first cookie that came to my mind when I started to sketch my ideas for the Baptism set.
Tools Needed
- Cross Cookie Cutter
- Mini Fondant Flower Cutter
- Wilton Pink Gel Color
- Ateco Tips (# 1.5 & # 2)
- Piping Bags
- Royal Icing (Pink & White)
- Small Fondant Rolling Pin
- Fondant Ball Tool
- Fondant Shaping Foam
- Gum Paste
- Toothpicks
- Small Brush
- Baked Cookies
Lets start out by making the gum paste flowers!
Take a small amount of gum paste and with a toothpick add a small amount of the Wilton pink gel color. Kneed the pink gel color into the gum paste until you can’t see any streaks. Using a small fondant rolling pin roll out your fondant. Take your mini fondant flower cutter and cut out as many flowers as you can. Transfer your fondant flowers to a shaping foam and with your ball tool press down on the center of the flower so that the petals wrap around the ball tool. Leave your flowers to dry overnight.
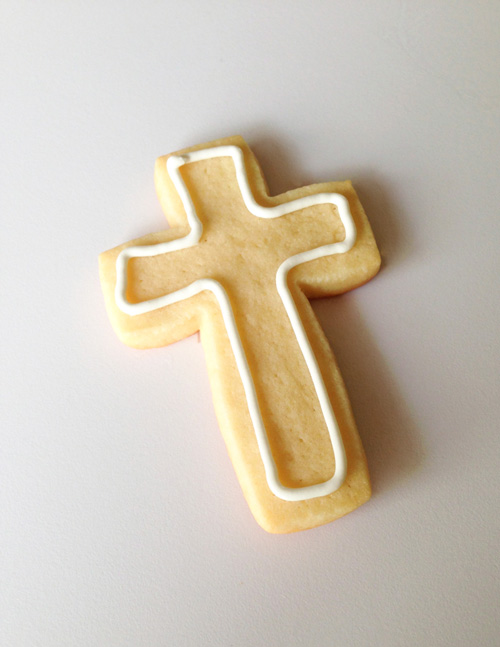
While your gum paste flowers are drying, outline your cross cookie with stiff white royal icing using an Ateco tip #1.5. Make sure to leave a small border all around.
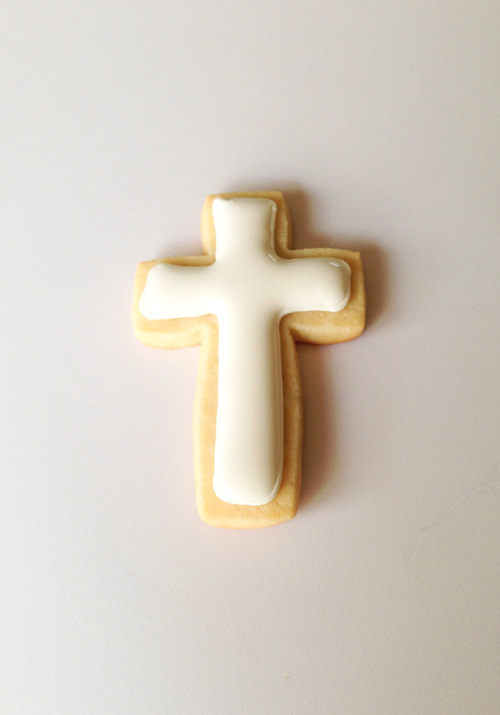
Now flood your cookie with flood consistency white royal icing using an Ateco tip # 2. Let your cookies dry for 24 hours.
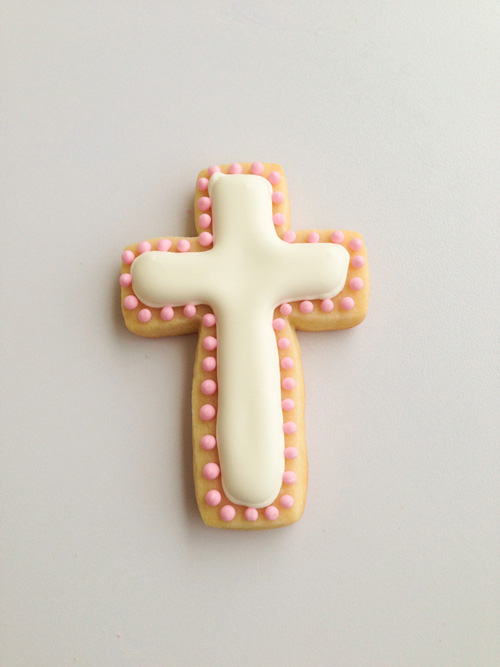
Using medium consistency pink royal icing and an Ateco tip # 1.5 add small dots all around the border. Let the dots dry 4-8 hours.
Tip: If any of your dots have a peak you can remove it by dipping a small brush in water and gently patting the top of the dot.
After the dots have dried, add a dot of stiff white royal icing (which will act as a glue) at the center of the cross and place your mini fondant flower. At the center of the flower add a dot of white royal icing.
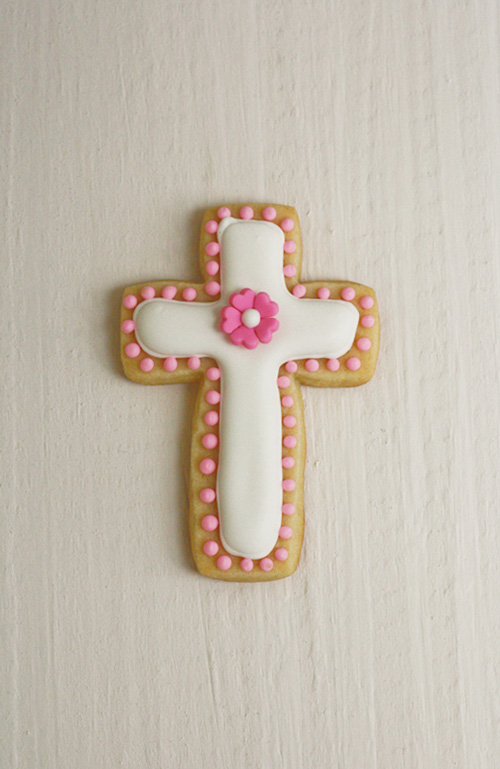
Before packaging your beautiful cross cookies, let them dry out for 2-4 hours.
I hope you enjoyed this tutorial!
I also wanted to share with you a picture of the complete packaged Baptism cookie set that includes the Monogram Cookies and the Rose Cookies.

The cross cookies would also make an adorable thank you gift for your guests at any Baptism party. Just place the cookies in a cello bag and tie the tops with a pink satin ribbon and you’re all set!
Thank you for stopping by!
Stay sweet,

Leave a Comment