I hope everyone is having a wonderful weekend so far! On Easter Sunday we went over to my parents house to have breakfast. Everything my mom made was so delicious! We had a spinach and cheese quiche, french toast and my aunt Magi brought over some freshly squeezed orange juice.
After breakfast we spent some time with my parents and later that afternoon we went home to sit out in the backyard with our four legged babies Mr. Cat and Sheika (actually it was just Sheika because Mr.Cat was napping as usual). It was such a beautiful afternoon! It was nice and breezy and not too hot. As I looked around the yard I could see all of our flowers starting to bloom and so many butterflies flying around the yard. I was immediately inspired to make some butterfly cookies!

Tools Needed:
- Mini Butterfly Cutters
- Baked Cookies
- Cookie Sticks
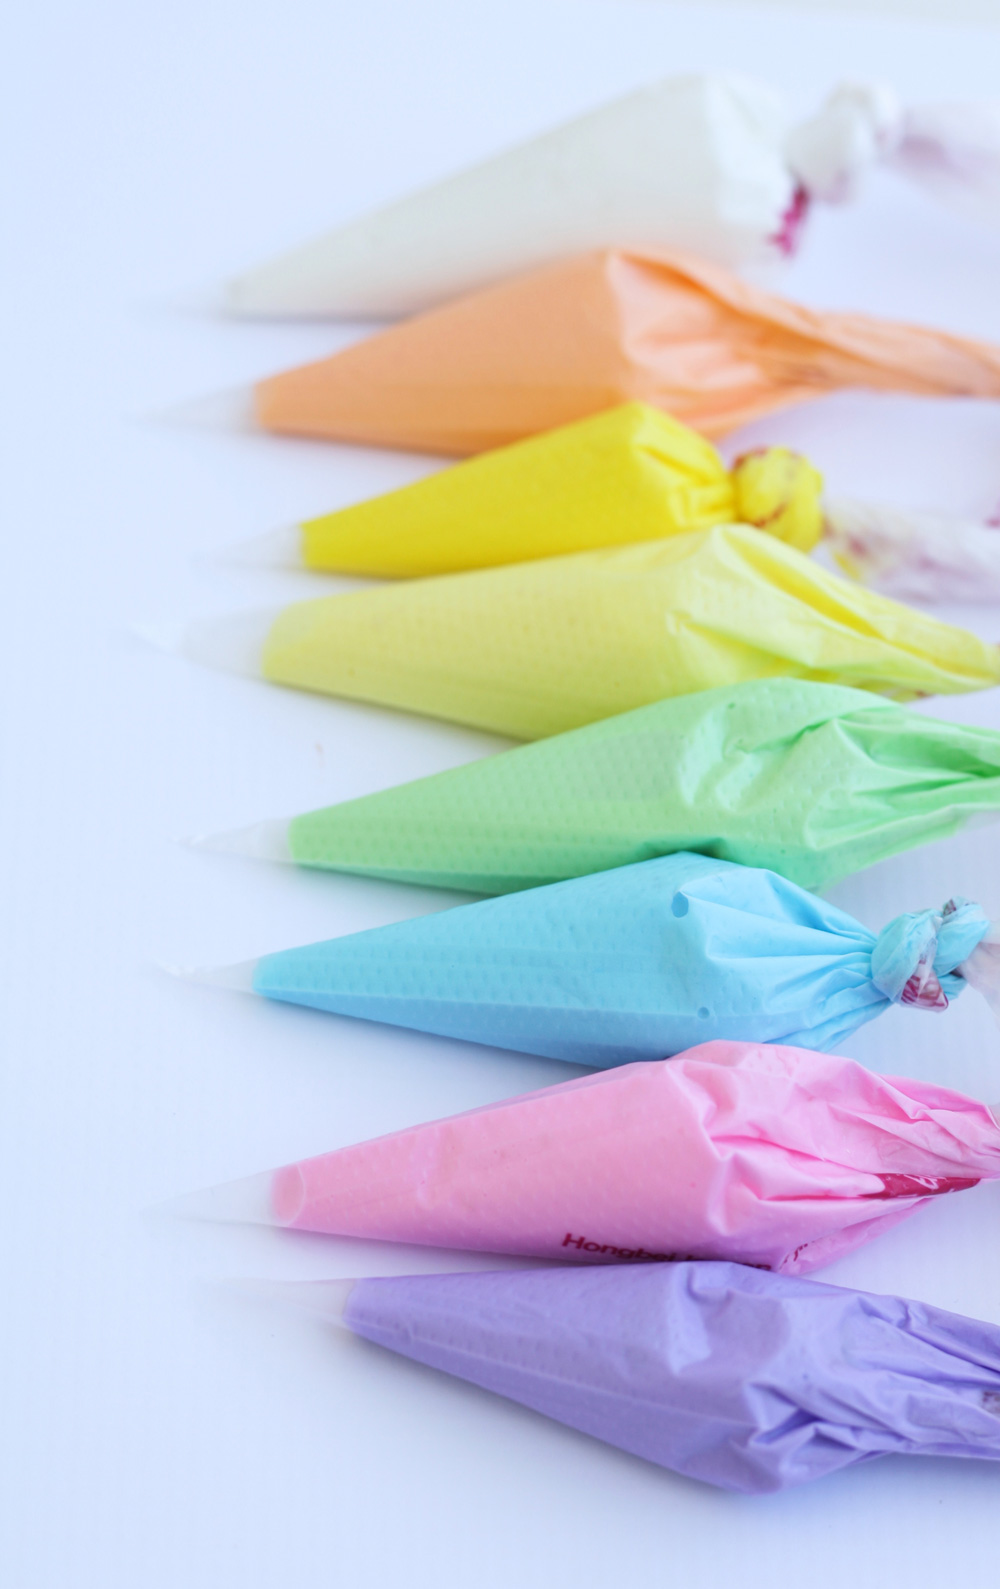
- Royal Icing
- Piping Bags
- Wilton Gel Colors (Pink, Yellow, Sky Blue, Leaf Green, Violet and Orange)
- Super Gold Luster Dust
- Vodka
- Small Paint Brush
- Thin White Satin Ribbon
When I am working with so many different colors I like to color all the royal icing first. That way when I sit down to decorate my cookies all the colors are ready to go and I don’t have to stop to mix the next color. I also love my tipless bags! I like them so much because I don’t need to add a tip to the piping bag and after I am done I just throw them away because they are so cheap! I will have a post on them soon.
All the butterflies had a different shape and because I am not very good at free hand drawing I decided to use an edible marker to trace the design that I wanted onto the butterfly. If you notice in the picture below there is a yellow outline (that is not perfect) which is where I used the edible marker to transfer the design that I had in mind. For this design in particular I wanted to use little heart shapes. So for the first step trace over the outline on the cookie using medium consistency pink royal icing.
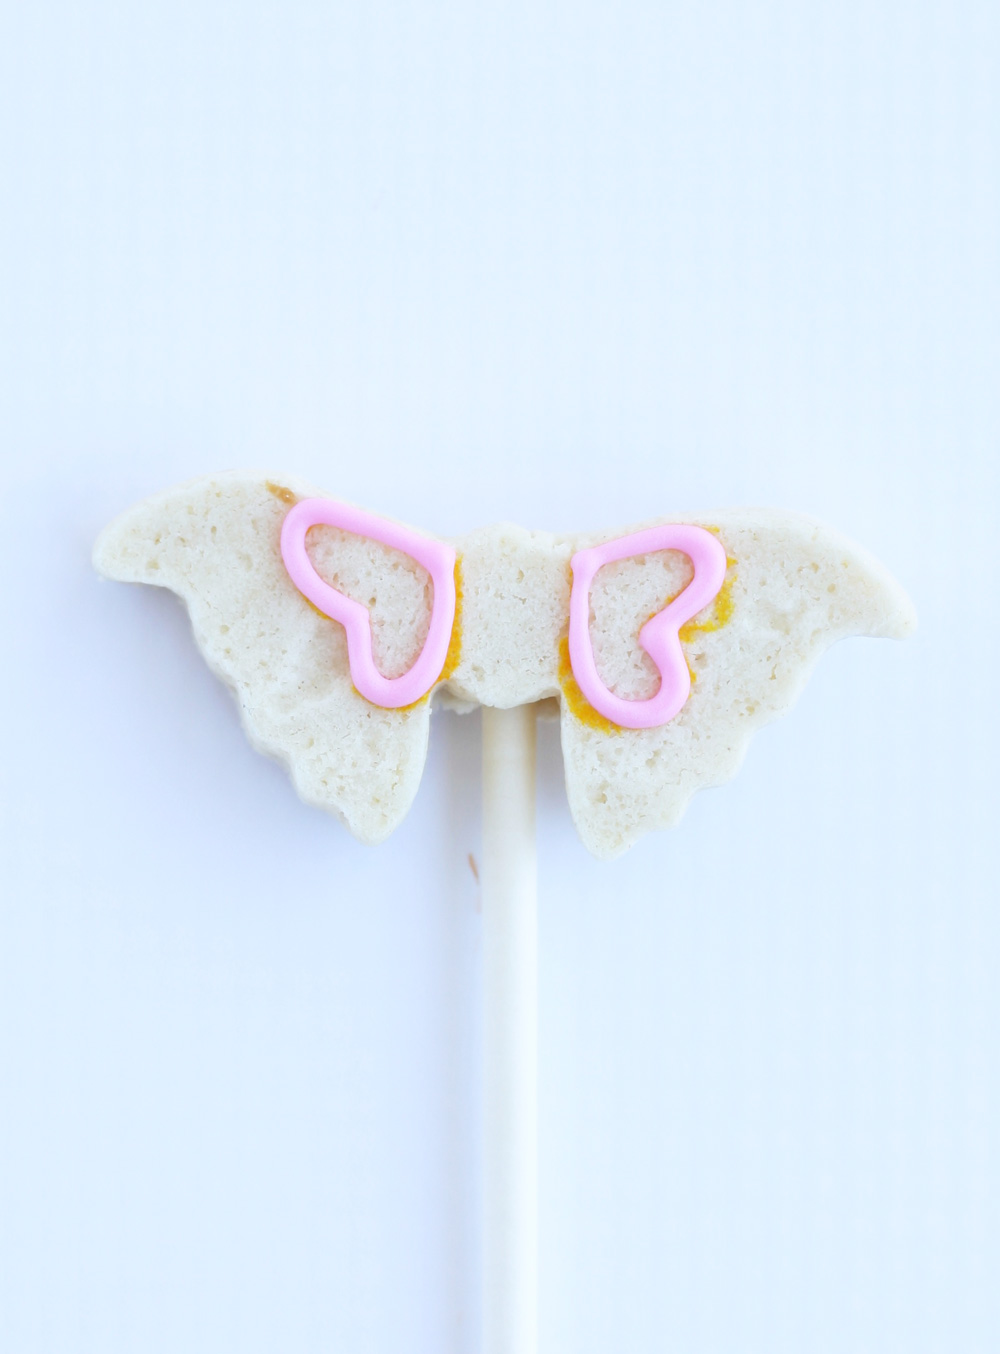
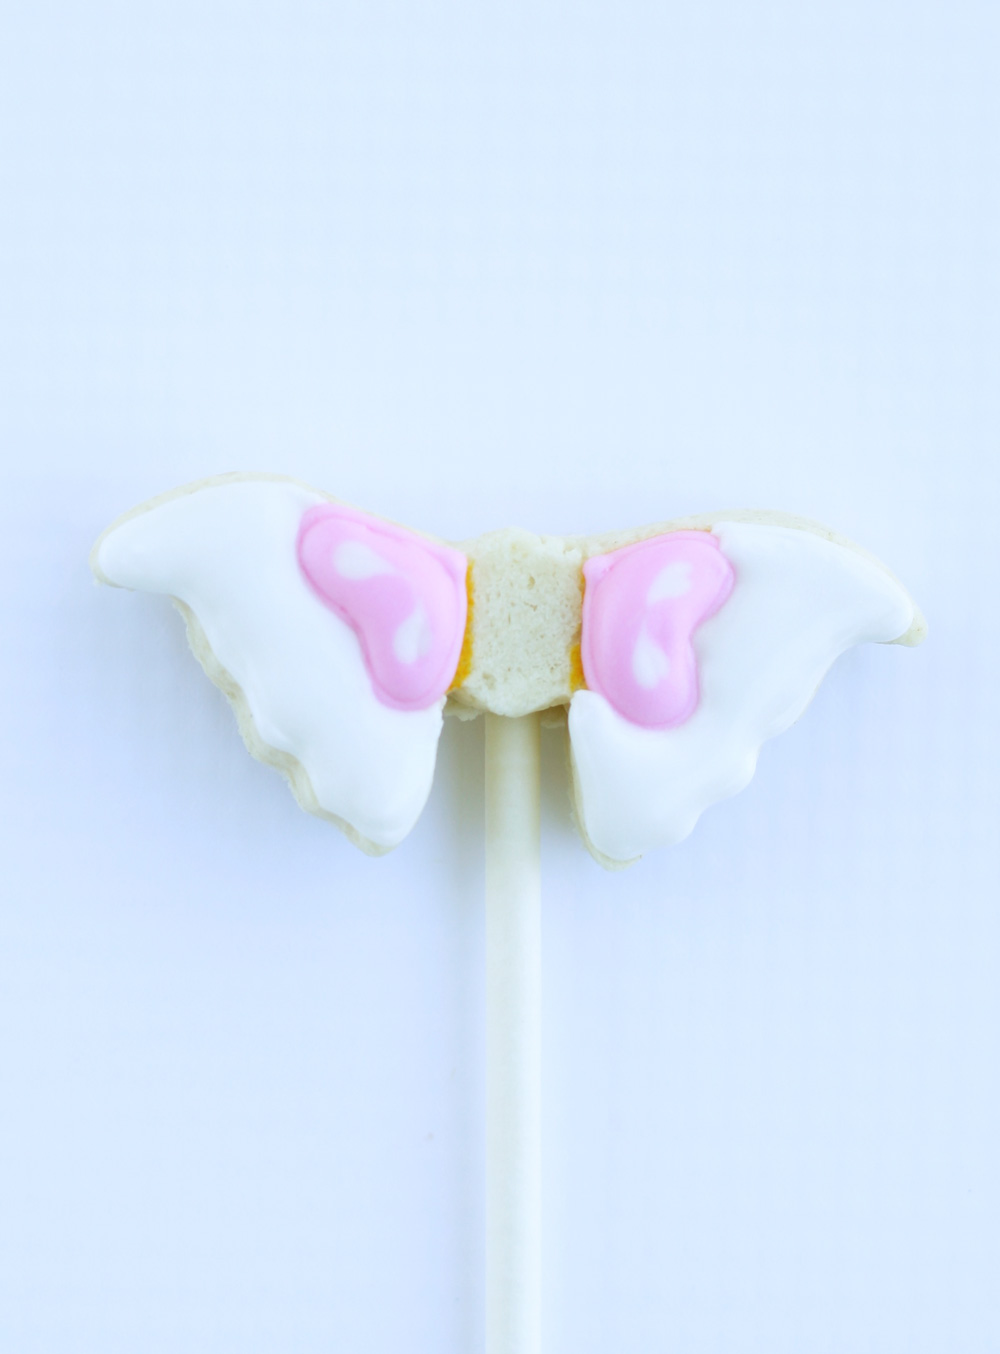
Next, flood in the shape with the same pink royal icing and add two dots on each corner with white royal icing. Using a toothpick drag each corner of the dots towards each other. Let this dry out for 10 minutes before adding the next color.

Because I was using white royal icing next to the pink royal icing I let it dry so that the pink would not bleed into the white. If I was going to use a darker color next to the pink I would have done the next step right away. If you mix a light color of royal icing with a darker color of royal icing, the darker color may bleed into the lighter if it is not dry. So after 10 minutes flood the outer wings with medium consistency white royal icing. Let the outer wings dry out 20-30 minutes before you go to the next step.
Add mini dots throughout the outline of the outer wings with the same medium consistency pink royal icing. Next, add three dots to create the body of the butterfly using stiff consistency yellow royal icing. Because the mini dots are so delicate let them dry out overnight.
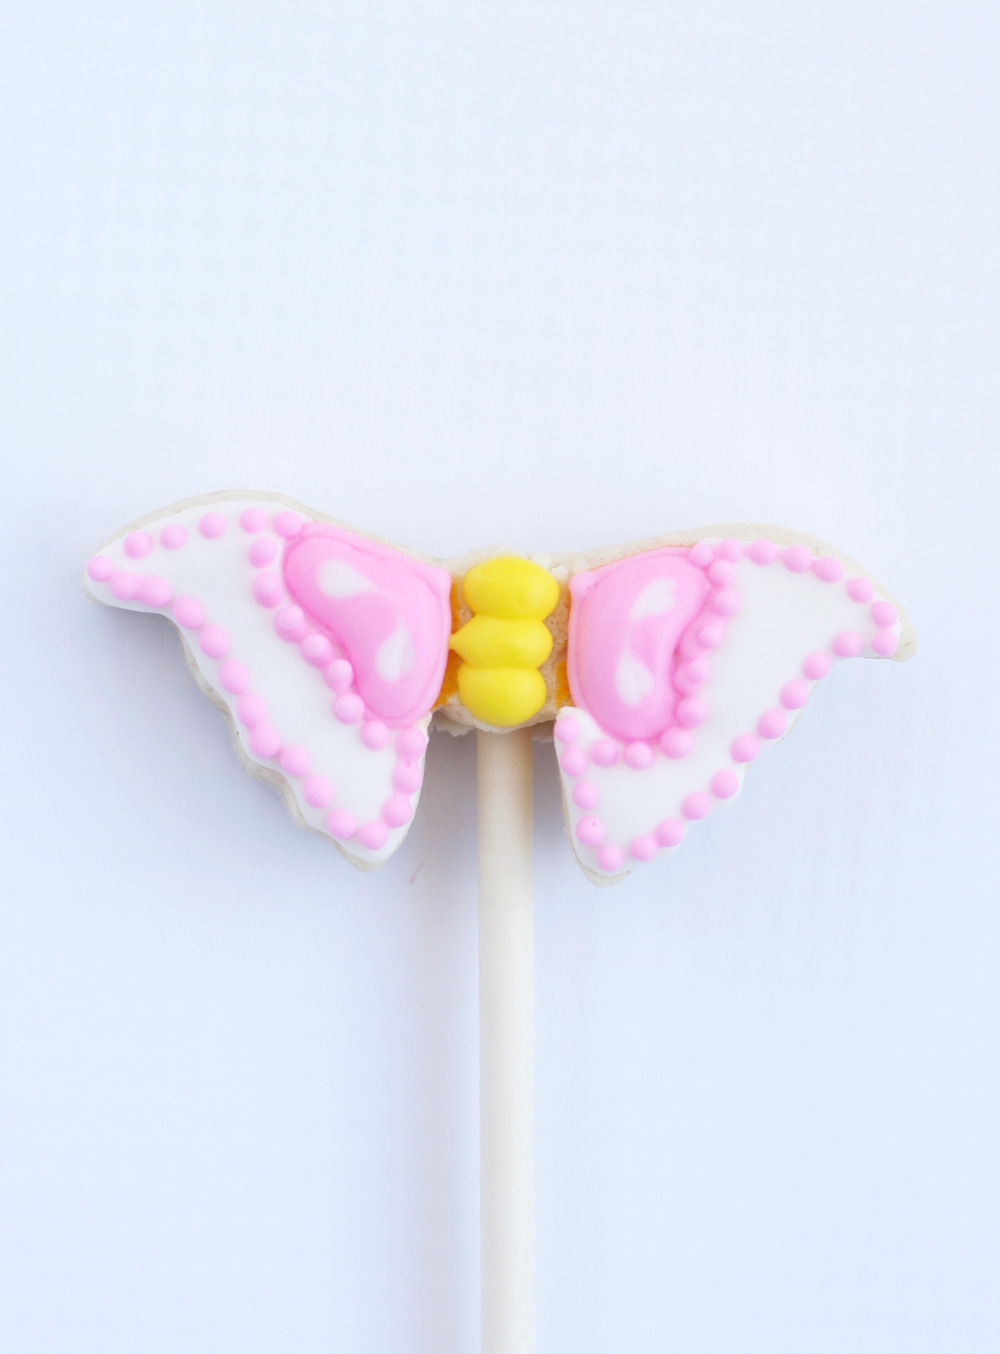
Mix a small amount of super gold luster dust and vodka together and paint the body of the butterfly with a small paint brush. As the vodka evaporates the beautiful gold luster dust will come out. For the finishing touch add a pretty bow below the cookie using a thin white satin ribbon.
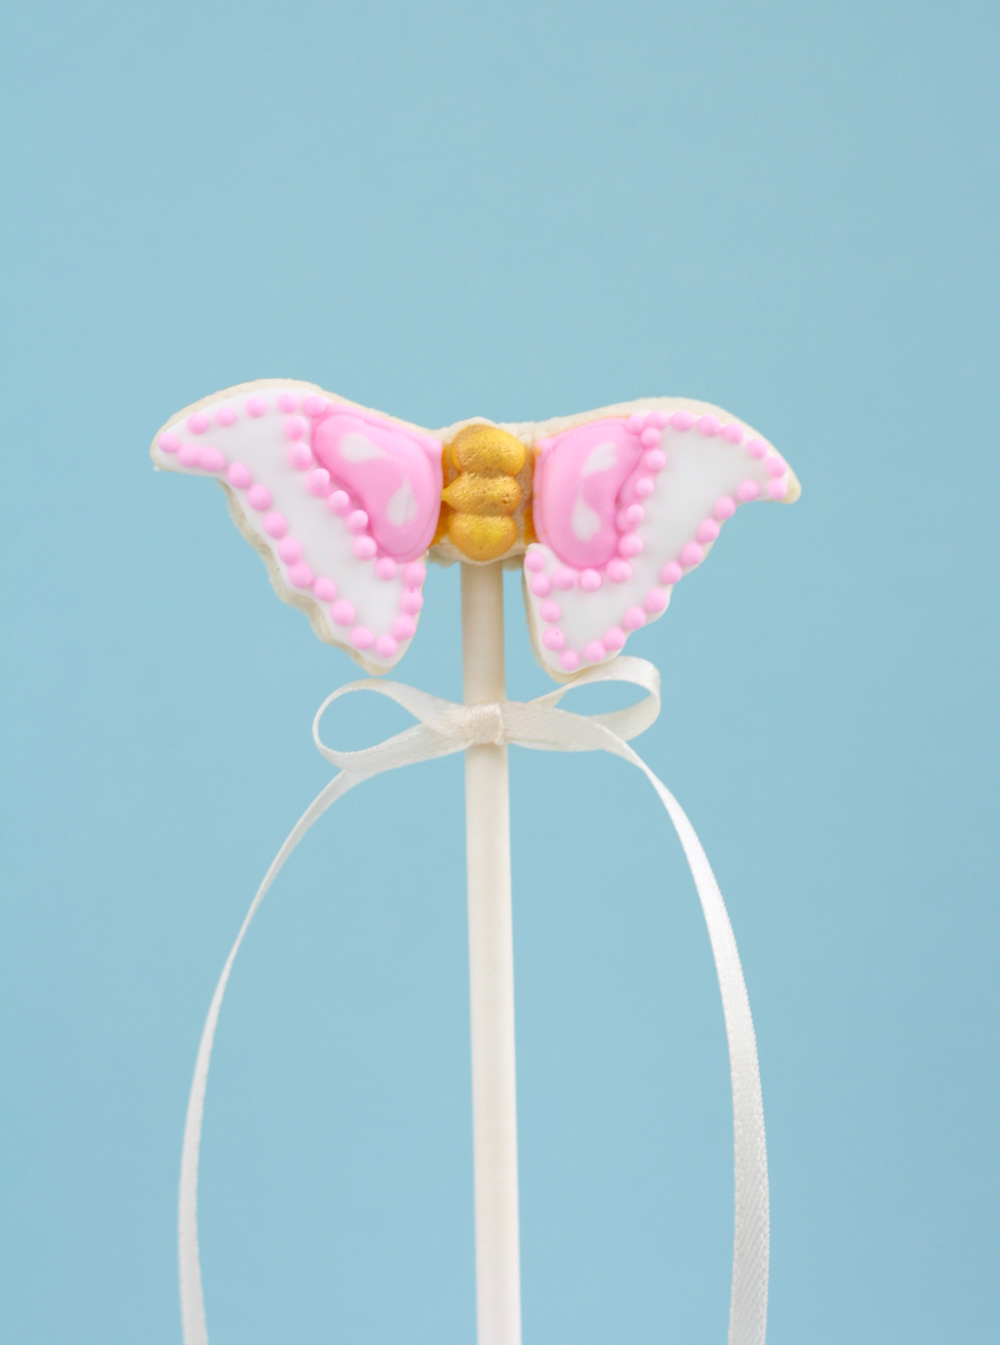
I really like the bow at the bottom of the cookie! It adds a pretty touch and makes it look more like a wand!
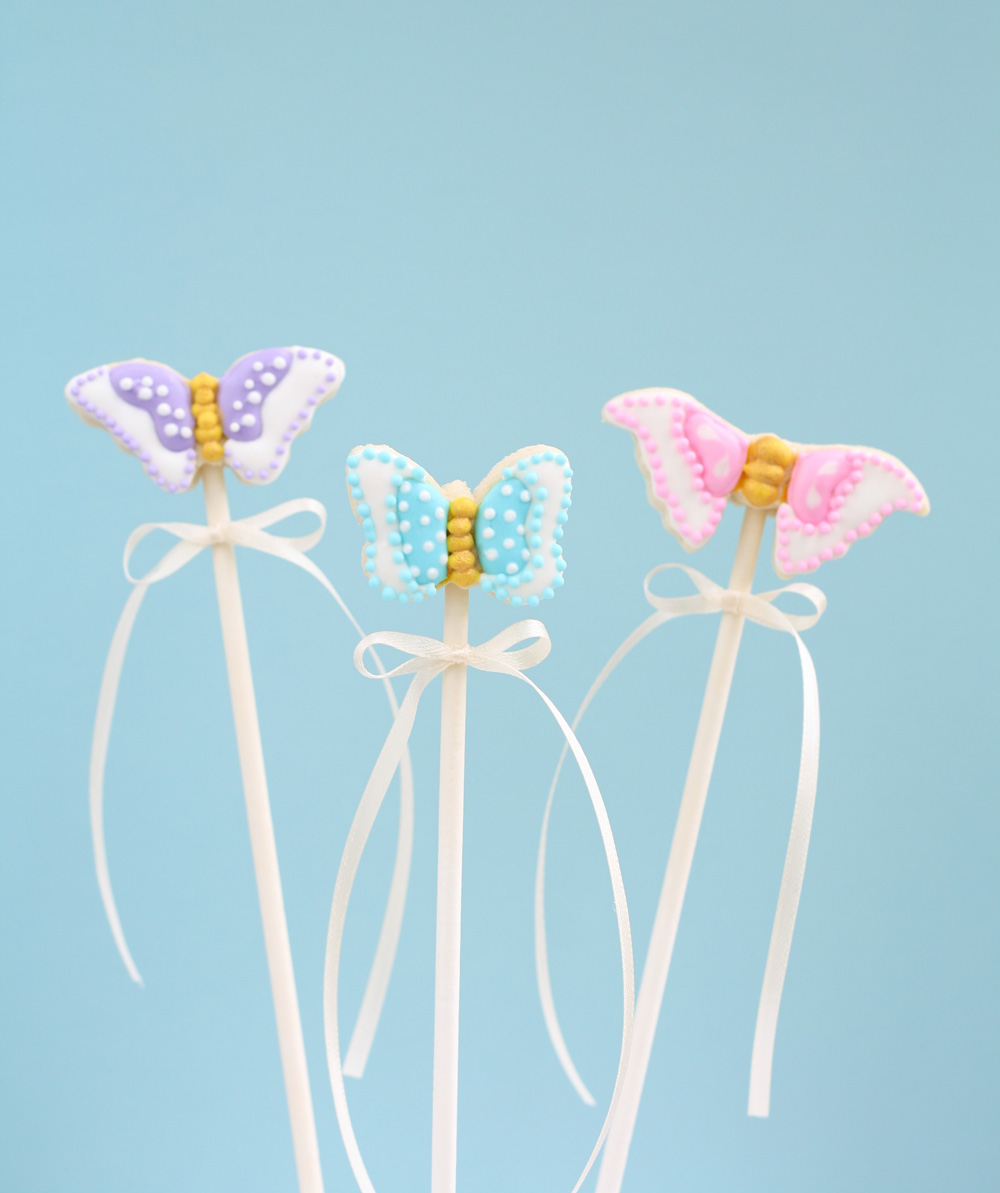
I hope I have inspired you to make your own butterfly cookies.
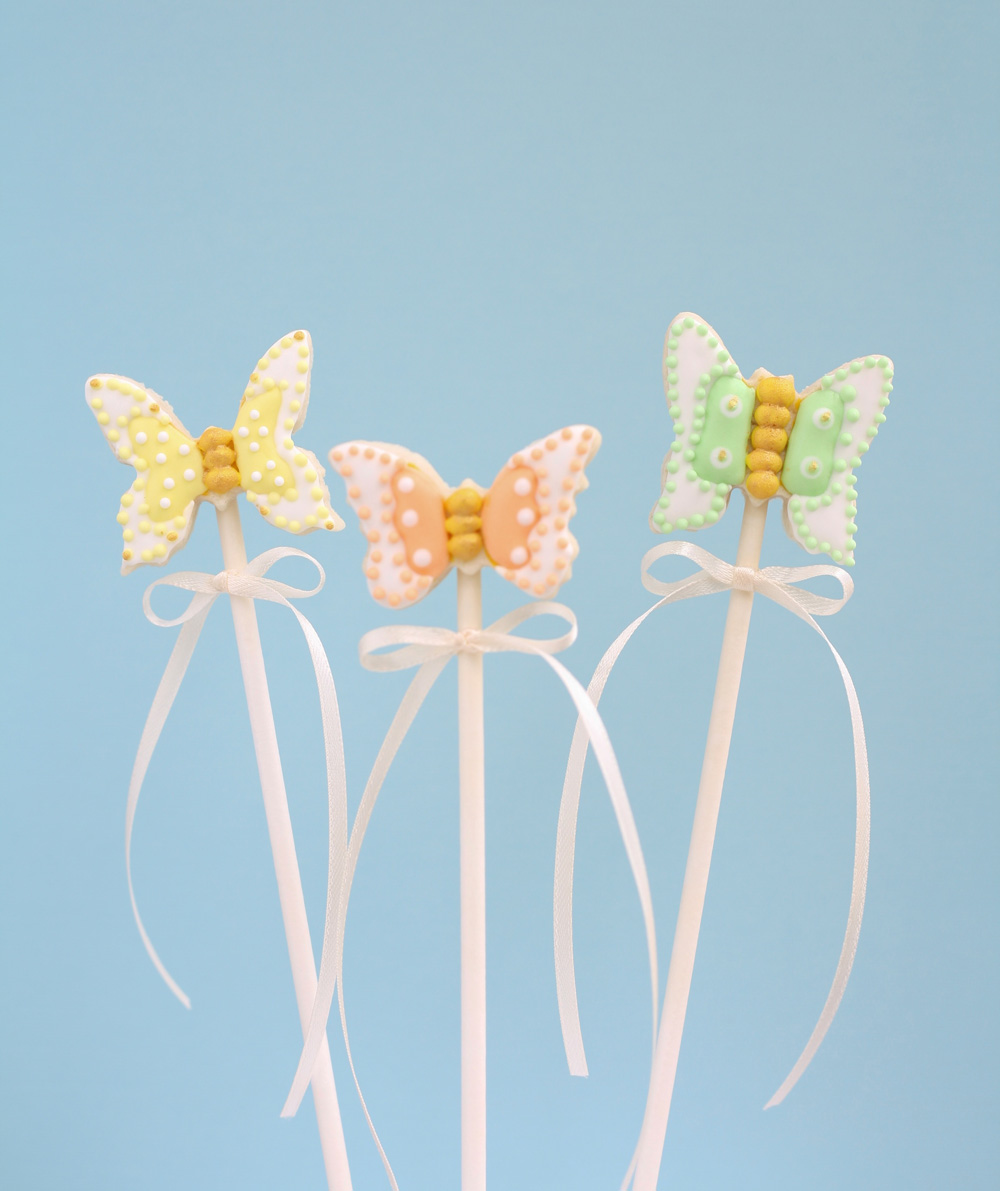
Wouldn’t these look pretty at a butterfly or fairy themed birthday party? Or maybe even at an Easter party…

XO,

Leave a Comment